Wednesday, April 27, 2011

The Royal Tea Cup

Yes, I fully admit it...I am a royal watcher. Couldn't resist picking up this tea cup, saucer and mug, adorned with gold gilt. Come Friday morning at 3am I most likely will toddle over to the t.v. and turn it on, just so see Cate  emerge from her car or carriage, like some sort of butterfly, to walk down West Minster Abbey aisle. It's okay, there will be hundreds doing it, and we'll wave little flags and drink tea out of our royal teacups. Pip, pip, cheerio, and all that sort of thing....

Sunday, April 24, 2011

Easy Quilt (Part 10) Victorian

 This is the finished quilt. Not too much detail, just a bit to give it a Victorian feel. Could have added mroe roses, but  figured it was best to be minimilist on this one. Maybe on the next one.
Attached roses, the fan, ribbon, sequins, pearls, etc in opposite corners. Takes a lot of sewing by hand to get them secured.

Ready to be shipped off ......rather east of here.....hopefully it will reach its destination in time for next weekend. Every quilt seems to have a piece of me just  waiting to bound forth. Every quilt made with someone in mind. Every quilt is a kindred spirit ( one of my favourite phrases).......

Saturday, April 23, 2011

Easy Quilt ( part 9) The Details

 Now comes the fun part. All the details are the best part oif making a quilt. Actually the quilt you just made is fine the way it is, but I want to do something else to give it sme zap. I pulled out silks and laces and pearls and made roses galore. Going to show you how I make them...very useful....can use this technique on any fabric.
 Cut out wide slices of silk. Doesn't matter what wideth, the strips can all be different widths...makes it more interesting.
 Cut this strip of silk 3 inches. All of the  thicker fabric will be folded.
 lace I cut  in thin widths because it will not be folded. All of the strips are about 12 inches long, the longer  the strip the bigger the rose. The shorter the strip the smaller the rose.
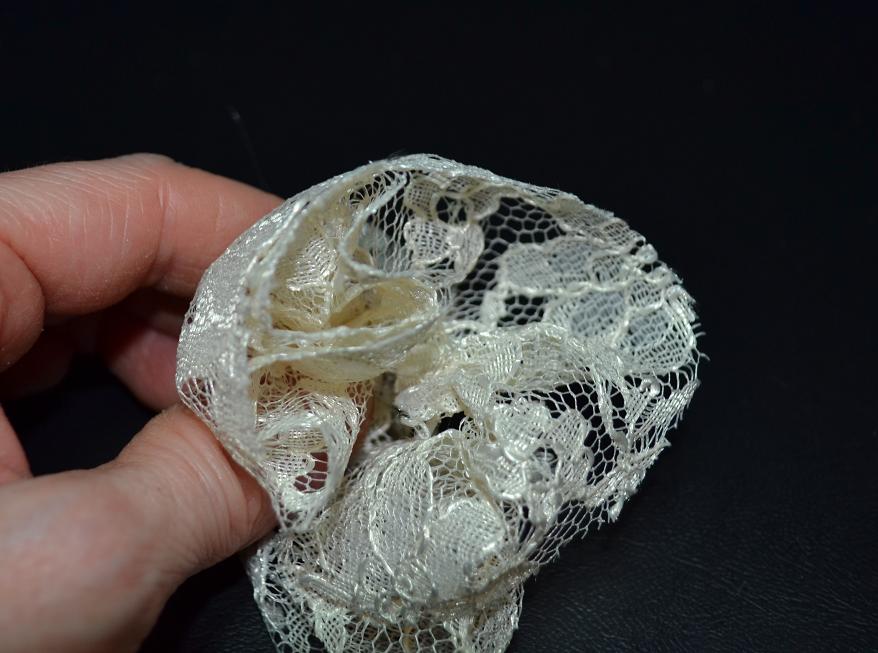
 Found some left over bridal lace....going to join it at the sheer end o make a fan shape.
 Took  some green/gold brocade silk and cut out leaves.....leave the rough edges alone, makes it more real looking.
 Sew a running stitch along raw edges of strips. Pull the fabric  to make it gathered , as tight or as loose as you wish.
 Start rolling with fingers......
 Roll completely tight.
 Sew the nub end to secure the edges.......you may have to do this by hand if the fabric is too thick.
 This is one of the finished roses....ready to be attached to the quilt......
 Take the green/gold leaves and sew a running stitch, to gather in the  middle.....
This is what you start  with ................in next part, the last one.......I'll show you what you can do with all of this.........so fun, so pretty.....

Easy Quilt ( Part 8) The Binding

                                    Lastly, The binding has to be attached all along the edge.
 Some quilters cut the fabric on a bias, but remember, I am lazy, so I just cut it out straight, sew all the pieves together, enough to reach all the way around. You can either measure the edges of your quilt to get the exact length, or do what I do, and just lay the binding pieces, sewn all in one, along the edge and see  how much I have.
 Right sides together, sew the binding to the thicknesses of yor quilt, turning at the corners, keeping it even. Continue all the way around.
 Get the cat to help. Here, Bo is holding down the fabric shile I attemt to urn the edges under while sewing a decorative stitch, on the final pass. She is really not much help, but likes the machine noises.
This is the final turn of the binding, tucking under the raw edges and making the binding even and flat.

Thursday, April 21, 2011

Easy Quilt ( Part 7) Trimming off edges

After finishing the quilting it's time to cut off the edges and make them even. At least, that's what I do, before going on with the next step.

Top of quilt, quilted. I wanted a simple pattern, since I'm going to be adding something to the top.

Back. I like this. Kind of neat. Also adding something to the back.......stay tuned.

Wednesday, April 20, 2011

Easy Quilt ( Part 6) Backing

THis is what it will look like with the three pieces together: 1. Backing on bottom. 2. Quilt batting in middle and 3. Quilt top.

 1. Cut Backing. Easiest way to do this is take your quilt top to fabric store and get them to sell you Sheeting. It is wide and sits flat.  This is about a double or queen size, depending on your finished size. The backing is about 94" x 60" approxmately. It should be about 3 inches or so over the edge of the quilt top to allow for stitching movement.  ( Remember this is just my way of doing this. Everyone has a method that works for them)
 2. Quilt batting. I use this Poly Down  . This is a queen size  bat.
 3. Quilt bat looks like this. I have also used the natural fibre batting. It is nice, but heavy and hard to sew through at times. There are several different varieties of batting. Talk to the people at the fabric store. They usually have a lot of ideas. Some quilt bats are only good for machine quilting. Others good for hand quilting. And still others are good for both. I am machine quilting this quilt, since  have  more details to put on afterwards.
 4. Cut Batting to be flush with the backing. Lay the batting on wrong side of the backing, with the righ side facing the floor.
 5. Lay ironed quilt top on the other two pieces,leaving a border as shown here. If you are going to hand quilt then  attach to your frame or hoop  and you can start quilting.
6. If machine quilting, use large safety pins to pin through all thicknesses in various squares to keep the three pieces together.  I like to roll up each edge, as shown, and pin together, so as to start in the middle of the quilt when I sew it. I've decided to do a simple swirly stitch going straight down the lines. As I said, I have plans for this quilt, and so don't really need to focus on a hand quilt stitch.I love hand quilting rather than machine, but this time it's going to be a little different.
 7.Pinned squares....make sure the safety pins are large.
8. With the edges rolled it is a little easier to work with. This time I started at the far edge of the open part of the quilt, then lined up my stitches to fall over the pieced lines of the squares. You can do whatever you want. So now you stitch through all thicknesses, being careful to keep the three pieces together and not pulling to the sides. And then we wil get to the fun part.....being a little more creative to turn this quilt into a more Victorian  style......

Tuesday, April 19, 2011

Easy Quilt ( Part 5) Dyeing with Tea and Beet Juice

 Dyeieng with Tea and Beet Juice is extremely satisfying. I do it the lazy way. Grab a handful of plain tea bags, toss into kitchen sink. Pour in the juice from a jar of pickled beets. Helps turn the tea dye  a nice ambient colour. Boil a couple of kettles of water, and pour in the water, hot, hot, scalding, over the tea bags and beet juice.
Using rubber gloves swish around the tea bags. Boil another kettle of water and pour that in as well. Stir with a wooden spoon at this point.

 Take quilt and dump into the mix, along with the tea bags. I dye the quilt top now, so that the  thread becomes tinged as well. Push down under the water, then cover with very hot water from the tap. Keep pushing down the fabric into the water, periodically,  and do this off and on for about half an hour. Remove from water, wring out, and throw into drier and dry for about 20 - 25 minutes till still a little damp, but not wet or dry.
The tea and beet juice will soften the colours...it won't be overly dramatic, but it will be lovely. Gives it an antiquw shading. Now go ahead and iron the quilt top. If you choose not to dye the fabric, then skip this  step and just iron the top ready for the next part.